 |
Any database connections you set up are available to all forms within any FormFlow or Workflow instance in your campus portal. |
Database connections let you exchange information between your form and the EX database, a custom ICS NET table, or your own custom table. Database connections use ODBC connection strings. When EX and the campus portal are installed, an EX database connection is created for you based on your campus portal Site Manager settings. Jenzabar recommends verifying the connection string before using the form, and deleting, updating, or creating different connections as needed. If you import a form and no database exists, the portlet will create a database but will not provide a connection string. An administrative user will have to manually update the connection string.
 |
Using
a standard ODBC connection string to SQL Server requires that
TLS 1.0 be enabled on the server. Some security standards require
that TLS 1.0 and TLS 1.1 be disabled on the server and force the
use of TLS 1.2.
Connection strings with the driver set to “SQL Server” will not work when connecting to a server with TLS 1.0 disabled. To fix the issue and ensure compatibility moving forward, the connection string driver should be updated to reflect the current version of SQL Server Native Client that is installed on the JICS web server. An example connection string is below:
DRIVER={SQL Server Native Client 12.0};SERVER=myserver;UID=te_pgmr;PWD=password;DATABASE=TmsePrd;Application Name=EX FormFlow - Forms;
NOTE: This currently only impacts customers that have the requirement to disable TLS 1.0. However, it is recommend that all clients follow this practice to avoid compatibility issues moving forward. |
 |
Ensure the user specified in the database connection string has permission to access the objects defined in your data sources, mapped statements, or stored procedures. |
Set Up the EX Database Connection
|
|
Jenzabar creates the default EX connection string for your school based on your school's campus portal Site Manager, Site Settings, Framework Settings, and ERP. You can then verify the connection string using the Databases page. |
|
The database connection is specific to EX FormFlow and not a specific form. Additionally, the database connections you access through the Workflow feature are the same as those accessed through FormFlow - Forms. This means you do not need to set up a database connection for every feature or form; the connection will be available for any forms and feature instances you create. |
Recommended Practice: Instead of using your school's SA credentials, create a generic FormFlow - Forms user account or use a dedicated service account such as ICSNetUser to access the data. This user account will need to be granted the appropriate permissions to the database tables and other database objects used regularly. TE_PGMR can be used, but if the TE_PGMR password changes, your team may forget to make the update in FormFlow - Forms and the database connection will no longer work.
1. Log in to the campus portal as an administrator and access EX FormFlow - Forms.
2. Click Manage Forms. The Manage Forms page appears.
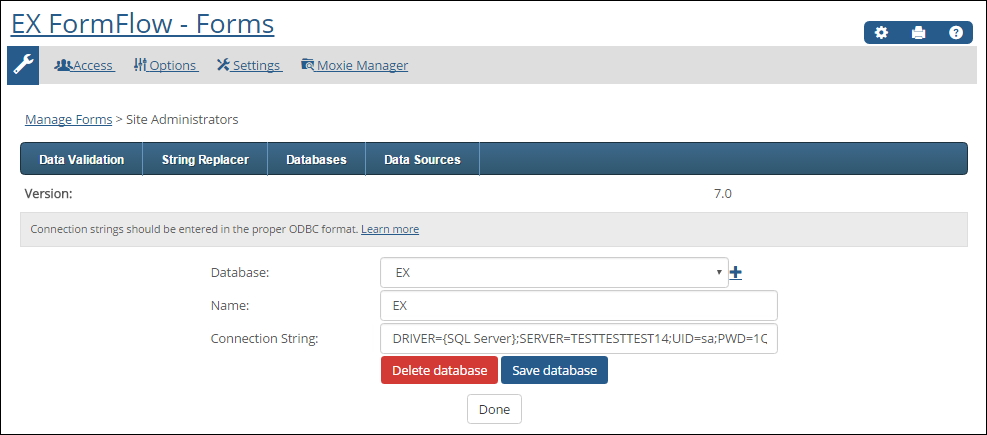
3. Access the Database page:
o Click Site Administrators. When the Site Administrators page appears, click Databases.
OR
o Click on the name of the form you are working with. When the form appears, select Databases from the Tools menu.
4. From the Database drop-down, select your EX database.
5. Verify the connection string is valid and follows your school's internal best practices.
6. Click Save database.
7. Click Done.
Add a Database Connection
1. Log in to the campus portal as an administrator and access EX FormFlow - Forms.
2. Click Manage Forms. The Manage Forms page appears.
3. Access the Database page:
o Click Site Administrators. When the Site Administrators page appears, click Databases.
OR
o Click on the name of the form you are working with. When the form appears, select Databases from the Tools menu.
4. Click Databases. The Database page appears.
5. Click
the Add  icon.
icon.
6. In the Name field, enter the name of the database you are adding.
7. In the Connection String field, enter the ODBC connection string needed to connect to your database.
|
Connection string formatting is detailed on the connection strings website. The site includes details for SQL database strings as well as other databases. |
8. Click Save database.
9. Click Done.