Configurations must be set in both EX and the campus portal to support the Grade Entry feature.
1. Open the Registration Configuration window.
2. Click the Registration
Configuration tab.
Example

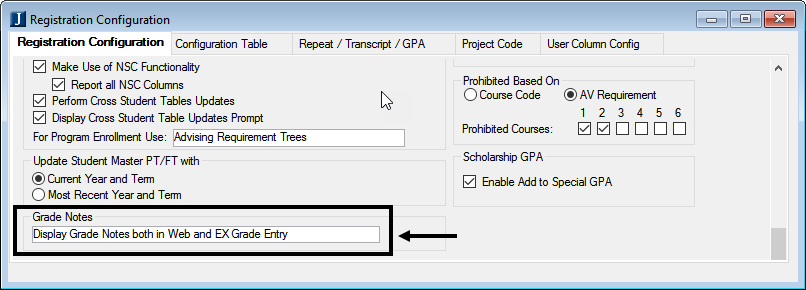
a. Locate the Grade Notes group box and choose one of the following options:
W - Display Grade Notes only in Web Grade Entry
E - Display Grade Notes only in EX Grade Entry
G - Display Grade Notes both in Web and EX Grade Entry
N - Do not display Grade Notes
Grade Notes are created by associating a specific type of attribute to a student. This attribute will display as a Grade Note in Grade Entry in EX and/or the campus portal according to the value selected from the Grade Notes drop-down pick list. GRNEW, GROLD, and GRD* attributes associated with the student will display in Grade Entry based on the setting selected. Dates of the attribute are also honored. If there are multiple GRNEW, GROLD, and GRD* notes, only the one with the latest date will display.
3. Click the Configuration
Table tab.
Example

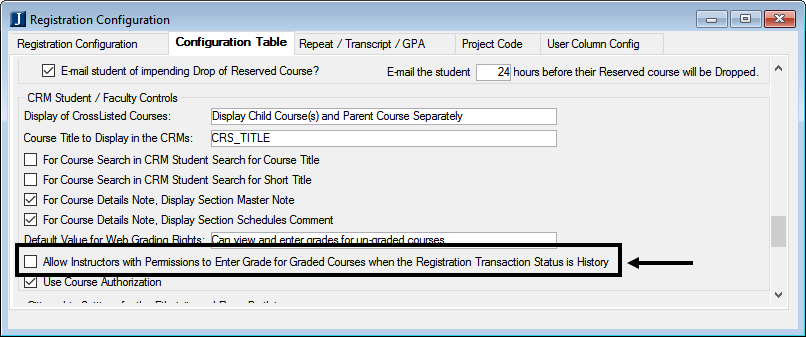
a. Select the Allow Instructors with Permissions to Enter Grade for Graded Courses when the Registration Transaction Status is History check box if you want to allow the Grade Entry feature user to change grades for registrations that have been set to the History status (assuming the Grade Entry Dates are still open).
4. To control which faculty members can enter grades, select the appropriate value in the Web Grading Rights column on the Faculty tab of the Courses window or the Faculty Load window in EX. If you allow individual faculty to edit graded courses (Option e below), there is still the overall configuration in the Registration Configuration window (shown above) that determines if faculty can change the grade after the Transaction Status of the course has become ‘H’ (History). The options are:
Can view and enter grades for ungraded courses
No access to view grades
View only access for grades
Can view and update grades for graded courses
Can view and edit for both graded and ungraded courses
5. To control whether a grade is to be available for selection in the feature:
a. Open
the Grade Table Definition
window.
Example

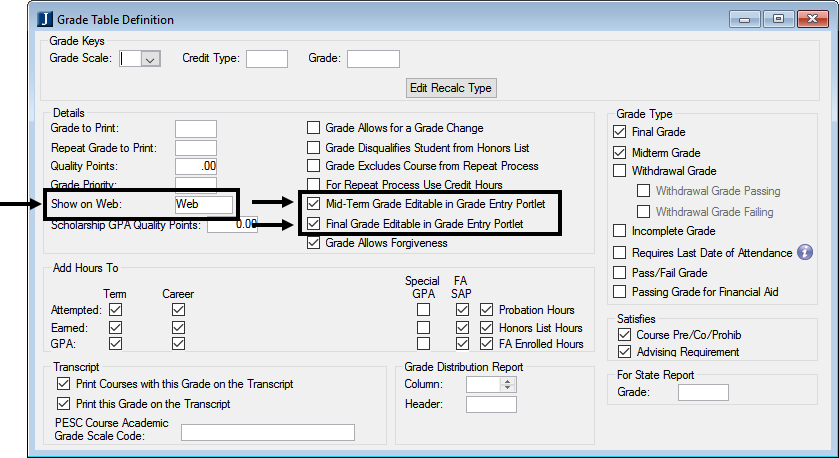
b. In the Details group box, choose WEB in the Show on Web drop-down pick list if you want this grade to be available for selection by the faculty in the Grade Entry feature and by the advisors or students in the GPA Projection feature in the campus portal.
i. If applicable, select the Mid-Term Grade Editable in Grade Entry Portlet checkbox.
ii. If applicable, select the Final Grade Editable in Grade Entry Portlet checkbox.
Configuration settings in JICS can be done by roles with permission to access and administer global and portlet settings.
If you are an administrator and need help in setting up and configuring this feature, see the Setup section of this help, or the Configuration Guides on MyJenzabar.
These settings can be done by the Student Administrator and/or Advisor Administrator, depending on which role you want to do the setup. These settings will be applied to all instances (copies) of the feature, regardless of the feature page on which the feature is located.
1. Log in as the campus portal administrator.
2. From the Grade
Entry feature, click the Setup
menu option.
The Portal Settings page
appears.
a. Select the Use Midterms check box if your institution allows faculty to enter and display midterm grade information. This allows a Midterm Grade column to display on the Update Student Grades screen. If you clear the Use Midterms check box, faculty will not be allowed to enter and display midterm grade information and columns and text related to midterm grades will not be displayed on the Update Student Grades screen.
b. Select the Allow Absence Entry check box if your institution allows faculty to enter and display the number of absences for students. This allows an Absences column to display on the Update Student Grades screen. If you clear the Allow Absence Entry checkbox, faculty will not be allowed to enter and display the number of absences for students and columns and text related to absences will not be displayed on the Update Student Grades screen.
c. Select the Allow Clock Hours Entry check box if your institution allows faculty to enter and display the number of clock hours that students attend class. This allows a Clock Hrs column to display on the Update Student Grades screen. If you clear the Allow Clock Hours Entry check box, faculty will not be allowed to enter and display the number of clock hours student attend class and columns and text related to clock hours will not be displayed on the Update Student Grades screen.
d. Select the appropriate option for the Allow Last Date of Attendance Entry.
i. If you select the Allow faculty members to submit Last Date of Attendance for their students when they are submitting grades check box, the following options are available:
1) Last Date of Attendance is optional for all students (grades can be submitted with or without a Last Date of Attendance)
2) Last Date of Attendance is required for all students (grades can only be submitted with an accompanying Last Date of Attendance)
3) Last Date of Attendance is required for all students with the following grades(s): If you select this option:
a) The grade Select… drop-down pick lists display all available grades from EX.
b) Three additional grade Select… drop-down pick lists are displayed; however, click the More… button to add as many as needed.
e. Click the Save button.